


FAQs
Featured Questions
Great question! You’ll need a solid, level base for your garden room or golf room kit. Concrete slabs, paving stones, ground screws, fixed frame kits, and similar solid foundations.
As long as it’s flat, level, and strong enough, our perimeter base channel will bolt straight onto it for a secure, wind-resistant fix. We’ll send you the exact drawings and specs tailored to your chosen base type.
Installation is one of the easiest parts of owning one of our garden rooms! A competent DIYer can typically finish the entire build in less than a day. In fact, a small team of three people put together a complete kit in under 3 hours during training.
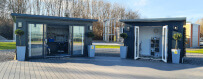
Garden Room Kit
| Product | Depth | U-Value (W/m2K) |
| QuadCore KS1000 RW Roof Panel | 80mm | 0.23 |
| QuadCore Coldstore Panel | 100mm | 0.18 |
| QuadCore AWP Panel (Floor) | 60mm | 0.32 |
Roof Panel
| Product | Depth | U-Value (W/m2K) |
| QuadCore KS1000 RW Roof Panel | 40mm | 0.47 |
| QuadCore KS1000 RW Roof Panel | 80mm | 0.23 |
| QuadCore KS1000 RW Roof Panel | 137mm | 0.13 |
Great question! A U-Value is simply a number that tells you how good the insulation is. Lower = better (less heat escapes). Our panels are designed with a very good U-Value, so your garden room stays warm in winter and cool in summer without high energy bills.
It shows the rate at which heat passes through one square metre of the structure for every 1°C difference between inside and outside temperatures. The lower the U-Value, the better the insulation — meaning your garden room will stay warmer in winter and cooler in summer, with far less energy needed for heating or cooling.
Our garden room kits use high-performance insulated panels with excellent (low) U-Values, delivering outstanding thermal efficiency all year round.
Yes, our garden room kits are specifically designed to resist wind uplift. We secure the entire structure using a robust perimeter base channel that runs around the bottom of the garden room. This channel is firmly fixed to a suitable base footing (such as a concrete foundation), creating a strong, continuous anchor that ties the building securely to the ground and prevents uplift even in high winds.
Yes, our garden room kits are structurally strong without needing a traditional timber frame.
The panels themselves contain built-in internal support and reinforcement, making them fully self-supporting. They interlock, this engineered design delivers excellent strength, rigidity, and long-term stability while keeping assembly quick and straightforward.
Our Garden Rooms do not include vents, the technology within our panels means you can stay warm in the winter and cool in the summer, however, you can add your own vents if you require them.
Yes, you can. The panels that form our garden rooms do not include window cut outs, however, you can cut the panels to suit your required opening size.
Yes, the panels used to create our garden rooms can be overclad with a range of materials (not sold by us).
The process is easy. You simply need to install timber battens on the face of the panels, then clad over using a suitable facade of your choosing.
We offer an assisted delivery service where our friendly team will unload the products from the vehicle and place them wherever you need, as long as access allows.
Planning Permission
Garden rooms are classified as outbuildings and therefore fall under permitted development rights for householders. Structures that are regarded as permitted developments do not require planning permission. However, they must comply with all conditions specified under planning laws. Should you be unsure of the conditions specified under the permitted development laws, please contact your local council planning department.
Building Regulations
We would recommend that you contact your local Building Control Department to enquire whether your structure and the building use will require building regulations approval.
It is the responsibility of the property owner to ensure that all Planning and Building regulations are satisfied by the relevant local departments, and the use of the building falls within the building regulation and planning stipulations.
We do not recommend installing log burners in our garden rooms. Our insulated panels are highly thermally efficient, so a log burner would produce far too much heat for the space.
If you’re looking for that cosy log-burner effect and ambiance, we recommend considering an electric heater designed to look like a real log burner. One of the main advantages of these heaters is that you can turn the heat down while leaving the lights on, still creating the attractive flame effect.
Should you decide to install a log-burning stove or similar solid fuel burner, we strongly recommend that the work is carried out by a specialist HETAS-approved contractor. This will ensure the installation is safe and fully suited to our garden room products.
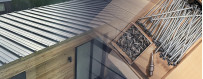
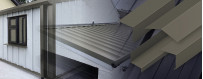
When ordering our panels, it is important to understand the Cut Back.
A "cut back" on an insulated roof panel is a factory-produced extension of the external (top) steel sheet at one end of the panel.
The top metal skin (outer weathering sheet) is made longer than the insulation core and the internal liner sheet. The length of this overhang is what's call the "cut-back" (sometimes referred to as "panel end cut-back" or "end cut-back" in their technical literature).
Why it exists
It creates a clean, overlapping joint (end lap) when one panel is laid over the next (normally eaves-to-ridge installation).
The panel length we sell, is calculated as the top sheet length.
It provides the correct overhang at eaves/gutter details.
It allows space for butyl sealant strips, stitching screws, and proper sealing to keep the roof watertight.
Without it, you couldn’t achieve the required lap detail while keeping the insulation cores butted tightly together.
We given here some standard applications
Standard eaves - 50 mm, 75 mm, 100 mm Most common for gutter overhang.
Standard end lap -150 mm Typical for multi-panel runs.
Class A / reduced end lap - 75 mm Used where a lower profile lap is needed.
Minimum 25mm Smallest option.
Maxmium 150mm Largest option.
The cut-back is only on one end of each panel
Imagine looking at the end of a Insulated roof panel:
The bottom (internal liner) and the thick insulation core stop at the true panel end.
When two panels meet at an end lap, the cut-back of the upper panel sits over the top of the lower panel, creating a stepped, sealed joint with sealant and fixings.
In short: the cut-back is simply the deliberately extended top sheet that makes laps and eaves details work cleanly and weather-tight. It’s a standard feature on virtually all KS1000RW panels and is shown on every Kingspan product data sheet under the heading “Panel End Cut Back”.
The top steel sheet continues out like a little shelf — that protruding shelf is the cut-back.
On each of our Garden Room product pages you will find the option to request an Insulation Guide on line. A pop window will appear for you to enter your details when you click on the link. Remeber to tell us the Garden Room model that you require the Insulation Guide for.
Yes, we’d be delighted for you to come and see some completed garden rooms in person. We have several display models built on site in different sizes and configurations. You can walk through them, inspect the quality of the panels and finishes up close, and get a real feel for the space and build quality. Viewings are Monday to Friday (9am to 4pm) only. Do let us know you are coming so we can give you a proper guided tour and answer all your questions. Just let us know a couple of dates and times that suit you and we’ll arrange a convenient slot.
Insulated Panel Store, Greenfield Business Park 2 Bagillt Rd, Holywell CH8 7GJ -
Monday to Friday 9am to 4pm. Site is not open on Bank Holidays. Find us on the What3Words ///hampers.comforted.grounded or on Google or Waze The Insulated Panel Store
Yes you can collect from our site in North Wales. Please ensure that you tell us when you are arriving for collection so that we can have your goods ready.
Insulated Panel Store, Greenfield Business Park 2 Bagillt Rd, Holywell CH8 7GJ - Monday to Friday 9am to 4pm. Site is not open on Bank Holidays. Find us on the What3Words ///visitors.composer.repaying or on Google or Waze The Insulated Panel Store
Please also telephone us when you have arrived also.
You’ll find the current estimated lead time clearly shown on every product page.
These can change depending on manufacturing demand, but as soon as your garden room is completed and ready, one of our team will personally call you to arrange delivery at a time that works best for you.
Yes, you can apply plasterboard to the inside of the insulated panels in your garden room.
Many customers choose to do this for a smooth, traditional internal finish that’s easy to skim, paint or wallpaper.
Recommended method:
Fix 25 mm or 38 mm timber battens horizontally or vertically to the panels first
Then screw standard 12.5 mm plasterboard onto the battens
This approach creates a neat, professional look while leaving a small service void behind the board (perfect for running electrics or adding extra sound insulation). It also protects the panel surface and maintains the excellent thermal performance of the insulation.
Yes, there are two main options for running electrics in your garden room.
Option 1 – Surface-mounted (quick & simple)
Run your cables inside plastic conduit fixed directly to the face of the insulated panels, and use surface-mounted boxes for switches, sockets, and other fittings.
Option 2 – Hidden wiring (neatest finish)
If you are installing plasterboard (over timber battens), you can hide all the cables neatly in the service void behind the plasterboard.
Important safety note:
We strongly recommend that you employ a qualified electrician to carry out all electrical work. This ensures everything is installed safely and complies with current building regulations.
Yes, you can install heating very effectively in your garden room. Thanks to the high-quality insulation in the floor, walls, and roof, the room heats up quickly and retains heat very well. This means you won’t need to keep the heater on for very long at all, helping to keep running costs surprisingly low.
Our top recommendation: Slim electric panel heaters
These are ideal for garden rooms because they are:
Very slim and wall-mounted, so they take up almost no floor space,
Other popular heating options:
Infrared panel heaters. Important note:
We recommend that all fixed electrical heating is installed by a qualified electrician.
Quick to heat up the room.
Energy-efficient with built-in thermostats and timers.
Completely silent and maintenance-free.
Low surface-temperature radiators.
The garden rooms are built from solid QuadCore insulated sandwich panels (no timber frame), so you need a clean, sealed entry point to keep the structure fully weather-tight and insulated. Here are the best practical methods, ranked from easiest/most recommended:
1. Best option – Through the base/floor (recommended)
Run your armoured cable (SWA) or conduit under or through the solid base before you lay the floor panels.
Drill a small hole (usually 20–32 mm) up through the concrete base where you want the cable to enter the room.
Feed the cable through the hole, then place the floor panels on top.
Seal the hole around the cable with Premseal BR sealant (the grey mastic you already stock) or a suitable polyurethane sealant.
This keeps the cable completely hidden and protected, with zero penetration through the insulated panels.
2. Through the lower wall panel (very common second choice)
If the base is already down:
Choose a low position on one of the wall panels (ideally near a corner or where you plan sockets).
Drill a clean, straight hole with a hole saw (slightly larger than your cable or conduit — e.g. 25 mm for a 20 mm cable).
Push a weatherproof cable gland or PVC grommet through the hole from the outside.
Feed the cable through the gland and tighten it so it compresses and seals.
On both sides, apply a generous bead of Premseal BR sealant around the gland/cable for extra weatherproofing.
Inside the room you can then run the cable in mini-trunking or surface conduit to your consumer unit or sockets.
Quick tips for a professional result.
Use armoured cable (SWA) buried in the garden and brought into the room — it’s the safest and most compliant option for outbuildings.
Always use a weatherproof cable entry gland (available on Amazon/eBay for a few pounds) rather than just pushing cable through a hole.
Seal everything with your Premseal BR sealant + a bit of the PVC Foam Tape if you want extra compression around the entry.
Keep the hole as high as possible above ground level (minimum 150 mm) to avoid splash-back.
Inside the room you’ll need a small consumer unit with RCD protection and proper earthing.
Important safety note. Must be installed by a qualified electrician.
Electricity in garden buildings must comply with UK Building Regulations (Part P). Unless you are a qualified electrician, we strongly recommend getting a Part P registered electrician to do the final connection and testing
No need to worry as our team can help answer your question.
Please go to our contract form page and type your question in the form provided.
Yes – absolutely! Our insulated panels are designed to be easily cut to size on site.
Watch this short video from our team showing exactly how quick and safe it is to cut an insulated panel using a standard circular saw:
▶️ How to Cut an Insulated Panel
(You’ll see the simple tools needed, safety tips, and step-by-step process for a clean cut every time.)
Extremely strong and rigid! Our 80mm insulated roof panels are built to handle serious loads with almost no deflection.
Watch this impressive strength test where a team member stands directly on a panel spanning 3.6 metres:
▶️ Strength Test on our 80mm Insulated Roof Panel
(You’ll see the real-world structural performance for yourself – just 3mm deflection under full weight.)
Extremely quick! Our insulated panels are designed for fast, straightforward installation.
Watch our team carry out a full build test in order to test the instructions in this video. The team had zero experience in building a garden room and none of them had seen the instructions until the build – the entire process was completed surprisingly fast and smoothly:
▶️ Build Test – See How Quickly Our Panels Go Up
(You’ll see the real speed of assembly and how easily everything fits together on site.)
The panels have a light-weight insulation core. The longer the panel gets, the more the weight increases.
Core thickness: 80 mm (overall panel thickness is approx.
Each panel can be handled by one or two people. However, we recommend that all panels are handled by two people.
Weight: 10.5 kg per m²
Yes, we do sell the fixings, sealants, flashings, and other accessories you’ll need.
The Garden Room kits include all the required fixings and accessories.
If you’re buying panels on their own, we also supply all the necessary fixings, sealants, flashings, and other accessories to support your DIY project.
Yes, our Insulated Panels can be installed in winter, cold, or wet weather.
Unlike traditional construction methods using timber or rubber roofing, which require adhesives and dry conditions for curing, our Insulated Panels use a modern prefabricated dry-fix system with mechanical fixings. This allows reliable installation in most weather conditions, significantly reducing project delays caused by rain, low temperatures, or winter weather.
Once fitted, the panels provide immediate weather protection thanks to their sealed joints and durable steel faces, creating a weathertight envelope right away without waiting for materials to dry or set.
Important safety note: We strongly recommend avoiding installation in strong winds, as handling larger panels can become hazardous. In very cold conditions, installers should also allow for minor thermal movement during fixing.
This flexibility is one of the big advantages of our panels compared to conventional builds!
On InsulatedPanelStore.co.uk we show prices in two different ways depending on the product:
Standard products (insulated panels, flashings, fixings, screws, etc.) are shown exclusive of VAT (ex VAT).
We do indicate next to the price if VAT is included or not.
VAT at the current rate of 20% is clearly shown and applied automatically at the checkout.
The final total in your basket will always be shown inclusive of VAT.
VAT-registered trade customers can normally reclaim the VAT on any items shown ex VAT.
Garden Room Kits are shown inclusive of VAT (inc VAT).
Yes, we sell all the fixings, sealants, flashings, and edge trims you need to install our insulated panels.
Our complete Garden Room kits include every fixing and accessory required for installation.
If you’re buying panels on their own (or for a custom project), we stock a full range of compatible components in our dedicated Metal Flashings & Edge Trims and DIY Building Tools & Accessories sections. This includes:
Panel fixing screws and stitcher fixings (available in matching colours and various lengths)
High-performance sealants, including our BR Sealant
A wide selection of metal flashings and edge trims such as ridge flashings, mono ridge flashings, eaves closure trims, verge flashings, internal and external corner flashings, perimeter closure trims, and more — available in popular colours including Goosewing Grey, Anthracite, Terracotta, and White
All accessories are selected for perfect compatibility with our Kingspan insulated panels, helping you achieve a secure, weatherproof, and professional finish.
Need help choosing the right items for your project? Our team is happy to advise — just contact us.
All panels on our site have a fixed cover width of 1000 mm. Custom widths are not available.
Lengths:
Custom / non-standard sizes:
Yes — we offer a made-to-order custom panel service and factory custom cutting so you can order precise lengths to suit your project. Simply use the dedicated “Custom” product pages for roof or wall panels.
For very long panels or special requirements outside the standard ranges, please contact our team before ordering.
Roof panels (e.g. QuadCore KS1000RW): Custom lengths from 1.8 m to 13–14 m.
Wall panels (e.g. QuadCore KS1000RW & KS1000MR): Standard lengths from 1.8 m to 14.5 m
Technical data sheets are available to download on the product page.
QuadCore® is Kingspan’s advanced next-generation hybrid insulation core technology, used in our premium QuadCore KS1000 series panels (including the KS1000RW roof panels and KS1000MR wall panels).
It is a specially developed, self-blended closed-cell core that takes the proven qualities of traditional PIR insulation and improves them in key areas.
Main benefits compared to standard insulated panels:
Improved fire performance — QuadCore offers enhanced reaction-to-fire properties compared to standard PIR insulation, including lower smoke emissions and better overall fire behaviour. It achieves a Euroclass B-s1,d0 rating (internal face) and carries additional high-level approvals such as FM 4882.
Better energy efficiency & regulatory compliance — The superior insulation helps projects easily meet or exceed current UK Building Regulations (Part L / Section 6) for energy conservation. The airtight, single-fix panel system further minimises heat loss.
Practical advantages — You can achieve excellent thermal performance with standard or even thinner panels compared to many conventional insulated panels, while still benefiting from the speed, strength, and simplicity of Kingspan’s interlocking panel system.
In short, QuadCore technology gives you noticeably better thermal efficiency and enhanced fire performance in one easy-to-install panel — making it one of the highest-performing options available for garden rooms, studios, extensions, and other DIY or small-scale builds.
Superior thermal performance — QuadCore has an excellent thermal conductivity of just 0.018 W/m·K. This delivers approximately 11% better insulation performance than high-quality PIR cores. In real terms, this means significantly lower U-values for the same panel thickness. For example, our 80mm QuadCore roof panels achieve a U-value of 0.23 W/m²K. The result is better year-round comfort, lower heating and cooling costs, and reduced energy consumption.
Yes, a competent DIYer can install Kingspan insulated roof and wall panels. Our panels are designed to be straightforward to install, especially when using one of our complete Garden Room kits.
The panels are relatively lightweight, use a simple interlocking system, and are fixed mechanically — providing an immediate weathertight seal. Many customers successfully complete their builds with a small team, often finishing a garden room in less than a day.
Important safety warnings:..
Working with insulated panels — particularly on roofs — involves risks that must be taken seriously:
Working at height is dangerous. Always use proper scaffolding, edge protection, and fall prevention measures. Never work on a roof in windy, wet, or icy conditions.
Long panels can be awkward to handle, even though they are lightweight. Use correct lifting techniques and get assistance when needed.
When cutting panels, wear appropriate PPE including gloves, safety goggles, and a dust mask to protect against sharp edges and insulation dust.
Ensure the base or supporting structure is solid, level, and that panels are securely fixed to resist wind uplift.
If you are not experienced with roofing, working at height, or structural fixing, or if your project is large or complex, we strongly recommend using a professional installer.
We supply all the necessary fixings and accessories, and provide helpful installation videos and guidance. Our team is also happy to offer advice over the phone or email.
For larger roofs, commercial projects, or if you have any doubts about safety or technique, professional installation is the safest and most reliable choice..
Most of the tools required to install Kingspan insulated roof and wall panels are standard DIY equipment. The panels are designed for relatively straightforward mechanical fixing, so you won’t need any specialist machinery for most garden room, extension, or small building projects..
Essential Tools
Cordless drill/driver or impact driver — with the correct drive socket or bit for the panel screws (we sell Driving Socket Adapters specifically for this). Recommended Additional Items
Screwdriver bits and sockets that match your fixings. Safety Equipment (Essential).
Safety goggles
Never work on a roof in windy or wet conditions.
What We Recommend
We stock a range of DIY Building Tools and Accessories specifically chosen for installing our insulated panels, including:
Screw Fixing Packs
Our complete Garden Room kits include the necessary fixings and accessories, so you only need the basic power tools listed above.
For the best results, we strongly recommend watching our step-by-step installation videos before you start. These show real customers and our team demonstrating the correct techniques for cutting and fixing the panels.
If you’re unsure about any part of the process or need advice on the right tools for your specific project, just contact our team — we’re happy to help.
Circular saw — fitted with a fine-tooth blade suitable for cutting insulated panels and steel (this is the most common method our customers use).
Tape measure, spirit level, and chalk line (or laser level) — for accurate positioning and alignment.
Tin snips / aviation snips — for trimming flashings and edge trims.
Sealant gun — for applying sealants at joints and flashings (we stock BR Sealant).
Rivet gun (if using stitcher fixings or rivets).
A Screw Fixing Pack (we sell these ready-made for our panels).
Panel lifting aids or suction cups (helpful for longer panels).
A vacuum or brush to keep the work area clean of metal swarf and dust.
Always prioritise safety when working with panels, especially on roofs:
Cut-resistant gloves
Dust mask or respirator
Hard hat
Safety boots
Proper access equipment (stable ladder, scaffold tower, or platform)
Fall protection / harness system when working at height
Driving Socket Adapters
BR Sealant
Stitcher fixings
Insulated panels are relatively straightforward to install when done correctly, but a few common mistakes can lead to leaks, reduced performance, or structural issues. Here are the most frequent problems we see and how to avoid them:.
Poor sealing at joints and flashings
Not applying enough sealant or missing key areas (especially where panels meet flashings, ridges, eaves, or penetrations) is one of the biggest causes of leaks.
Incorrect or insufficient fixings
Using the wrong screws, wrong length, incorrect spacing, or over-tightening screws (which crushes the insulation and can create weak points).
Not properly interlocking the panels
Panels that are not fully clicked or slid together correctly can leave gaps that are difficult to seal later.
Inadequate preparation of the base or supporting structure
Installing on an uneven base, insufficient purlins/rafters, or not accounting for the required spans and fixings for wind uplift.
Skipping or incorrectly installing flashings and edge trims
Many leaks occur because ridge flashings, eaves closures, verge trims, or corner trims are missing, poorly fitted, or not sealed properly.
Cutting panels without proper support or the right tools
Unsupported panels can bend or the cut can be inaccurate and jagged.
Working in unsuitable weather conditions
Strong wind makes handling large panels dangerous and increases the risk of damage or poor fixing.
Following the manufacturer’s guidance, watching our step-by-step installation videos, and using the correct fixings and accessories from our DIY Building Tools & Accessories range will help you avoid most of these issues..
If you’re unsure about any part of your installation, feel free to contact our team — we’re happy to offer advice.
Avoid it by: Using a good quality sealant (such as our BR Sealant) generously at all joints and ensuring all flashings and edge trims are properly fitted and sealed..
Avoid it by: Using the correct panel fixing screws for your panel thickness and following the recommended fixing pattern. We sell ready-made Screw Fixing Packs and Driving Socket Adapters designed for our panels..
Avoid it by: Taking time to ensure each panel is fully engaged with the previous one along its full length before fixing..
Avoid it by: Making sure your base is solid, level, and that the supporting framework meets the span tables for your chosen panel thickness..
Avoid it by: Fitting all necessary flashings and trims as part of the installation — we stock a full range of compatible metal flashings and edge trims..
Avoid it by: Supporting the panel fully while cutting and using a circular saw with a suitable fine-tooth blade. Watch our installation videos for the correct technique..
Avoid it by: Only installing in calm conditions and always prioritising safety when working at height..
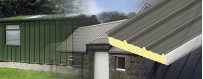
Yes, insulated panels can often be installed as an overlay on an existing roof, and it is a popular option when you want to improve insulation and weathertightness without stripping the old roof covering. This approach can save time and reduce disruption, as the new panels are fixed directly over the existing roof surface into the supporting structure below (usually purlins or rafters).
Important considerations before overlaying:
Structural strength — The existing roof structure must be capable of supporting the additional weight of the new insulated panels, fixings, and any increased wind or snow loads. For anything other than small, simple structures, we strongly recommend getting advice from a structural engineer or competent builder.
Condition of the existing roof — The roof should be reasonably flat, level, and structurally sound. Major damage, significant unevenness, or rotten timber should be repaired first.
Fixing method — You will need longer fixings that penetrate through the old roof covering and into the structural members below. Using the correct screws and fixing pattern is essential.
Flashings and detailing — All edges, ridges, eaves, verges, and penetrations must be properly finished with suitable flashings and sealants to prevent water ingress. We stock a full range of compatible metal flashings and edge trims.
Condensation risk — Overlaying can sometimes affect ventilation. In some cases, additional measures (such as a vapour control layer or improved ventilation) may be needed.
Building regulations and planning — Increasing the overall height of the roof or changing the appearance may require building regulations approval or planning permission, depending on your location and the size of the project.
Our recommendation:
Overlaying works well on many garages, outbuildings, and garden room-style structures when the existing roof is in good condition. However, for larger roofs or if you’re unsure about the structural integrity, we recommend speaking to a professional installer or structural engineer first.
We can supply the insulated panels, longer fixings, sealants, and all the flashings and trims you’ll need for an overlay project. If you tell us more about your existing roof (type, pitch, span, etc.), our team can advise on the best approach and suitable products.
Proper storage is important to protect your insulated panels from damage, moisture, before installation. Following these guidelines will help ensure they remain in good condition:
Keep panels off the ground — If possible, store panels on level timber bearers or pallets off the ground) to allow air circulation underneath and prevent contact with damp ground.
Store flat and supported — Lay panels flat and fully supported along their length. Avoid storing them on an angle or with large overhangs, as this can cause bending or distortion.
Protect from weather — Cover the panels with a waterproof tarpaulin or heavy-duty plastic sheeting. Ideally, allow some ventilation underneath the cover to reduce the risk of condensation building up between the panels.
Do not stack too high — Avoid stacking panels two high. Ensure stacks are stable and secure, especially in windy conditions.
Protect edges and corners — Be careful not to damage the edges or corners when moving or storing panels, as this can affect the weatherproof seal during installation.
Keep dry — Panels are OK in the wet, but if dry helps with the install. If panels do get wet, dry them thoroughly before installation.
Additional tips:
Store panels as close as possible to the installation area to minimise handling.
Following these simple steps will help keep your panels in excellent condition ready for a smooth installation. If you have any questions about storage for your specific project, feel free to contact our team.
Never walk on or place heavy objects on stored panels.
Long insulated panels (often 6m to 14m in length) require careful planning for delivery. Good preparation helps avoid delays, extra costs, or damage to your property.
Key things to prepare:
Vehicle access
Ensure there is clear access for a large rigid or articulated lorry. Check the width of your driveway, gates, and any narrow points. Measure the height clearance under trees, branches, wires, or arches. The vehicle will need space to manoeuvre and, in many cases, to turn around.
Firm, level ground
The delivery lorry is heavy. Soft ground, grass, or muddy driveways can cause the vehicle to get stuck. If your ground is soft, consider laying temporary trackway boards or sleepers in advance.
Clear unloading area
Prepare a flat, level, and clear space where the panels can be unloaded safely. This should be as close as possible to where you plan to store or install them. Remove any obstacles, vehicles, or garden furniture from the area.
Overhead and side clearance
Check for low-hanging branches, power lines, lamp posts, or building overhangs that could obstruct the lorry or the long panels during unloading.
Storage area ready
Have timber bearers or pallets ready on a flat surface so the panels can be stored off the ground immediately after delivery (see our FAQ on panel storage).
Assisted Delivery
We offer an assisted delivery service where the driver helps unload and place the panels (subject to safe access). This is very useful for long panels. However, this service is access-dependent — if the lorry cannot safely reach your site, you may need to arrange collection from our depot or alternative delivery arrangements.
Our recommendation
Contact our team before placing your order (or as soon as possible after) and let us know:
Your postcode
We can then advise on the best delivery method and whether assisted delivery will be suitable. Our team will also call you to arrange a convenient delivery date once your order is ready.
Good preparation makes delivery much smoother and helps protect both your panels and your property.
Any access restrictions (narrow drive, low bridge, weight limit, etc.)
Photos of the access route if possible
Our Garden Room and Golf Simulator kits are designed to be as complete as possible for straightforward DIY installation. While the exact contents can vary slightly depending on the model and size, here’s what is typically included:
Usually Included:
Insulated wall panels (QuadCore)
Not Included:
The solid, level base (concrete slab, paving, or suitable foundation) — this must be prepared by you or your builder beforehand
Additional Support
Every kit comes with access to our helpful installation videos and guidance. Our team is also available to answer questions during your build.
Tip: Because kit contents can vary depending on the specific model and options chosen, we recommend checking the exact specification on the product page for the kit you’re interested in. Alternatively, contact our team and we’ll happily confirm exactly what’s included in your chosen kit and answer any questions about the build.
Insulated roof panels (QuadCore)
Floor panels (on most kits)
Full fixing kit — including all necessary panel fixing screws and stitcher fixings
Flashings and edge trims — ridge, eaves, verge, corner, and perimeter trims in the chosen colour
Sealants — high-performance sealant for joints and flashings
Perimeter base channel — for securing the building to the base and providing wind uplift resistance
Driver Socket Adapter — Required to screw fixings
Rivit Tool — Tool to fit rivits to the building
Straps — Cargo straps used during the build
Instructions — How to build, drawings showing panel positions and fixing details.
Windows and doors
Power tools
Other DIY Tools not listed
Internal lining, electrics, heating, or finishing materials
Any groundworks or drainage
Yes, well-insulated garden rooms built with high-performance panels like our QuadCore range are very suitable for year-round use as home offices, studios, gyms, or even habitable spaces, provided they are properly specified and installed.
Why they work well for year-round use:
Excellent thermal performance — Our QuadCore insulated panels offer very low U-values, keeping the space warm in winter and cool in summer with relatively low energy use.
Important considerations:
Building Regulations — If the garden room will be used as a habitable space or as a permanent workspace, it may need to comply with Building Regulations (particularly for insulation, ventilation, electrics, and fire safety). We recommend checking with your local Building Control department.
Summary
For home offices, studios, or occasional habitable use, our garden room kits are an excellent choice and perform very well throughout the year. For full residential use (such as a self-contained annexe with bathroom facilities), we recommend speaking to your local authority and possibly a building professional to ensure full compliance.
If you’re planning to use your garden room year-round, feel free to contact our team. We can advise on the best panel thickness and specification for your intended use.
Airtight construction — The interlocking panel system creates a well-sealed building envelope, which helps maintain comfortable temperatures and reduces running costs.
Quick to heat — Because of the high insulation levels, the internal space warms up quickly and retains heat effectively.
Versatile finish — You can add internal plasterboard lining over timber battens for a more traditional room finish, and install electrics and heating as required.
Planning Permission — Most garden rooms fall under Permitted Development, but there are size and positioning limits. Always confirm with your local planning authority.
Heating — Electric panel heaters, infrared heating, or low-surface-temperature radiators work very well. We do not recommend solid fuel or log burners.
Electrics — Any electrical installation should be carried out by a qualified electrician and must comply with current regulations.
Ventilation & Condensation — While the panels perform very well, good ventilation and proper detailing (especially around windows, doors, and penetrations) are important for long-term comfort.
Base — A solid, level, and properly insulated base is essential for year-round comfort and to prevent damp issues.
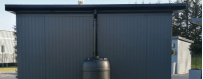
Insulated panels (such as our QuadCore range) for agricultural buildings is very common because they are quick to erect, durable, low-maintenance, and offer excellent thermal performance.However, planning and Building Regulation requirements depend on the size, location, and intended use of the building.
Planning Permission
Many agricultural buildings benefit from Permitted Development Rights. If your farm is 5 hectares (approximately 12 acres) or larger, you can often erect, extend, or alter agricultural buildings without needing full planning permission, provided certain limits on size and height are met.
Larger buildings, or those in sensitive areas (e.g. Green Belt, Areas of Outstanding Natural Beauty, or near listed buildings), may require a full planning application or Prior Approval.
Changes of use (for example, converting an agricultural building to commercial, storage, or residential use) are subject to different permitted development rules (such as Class R or Class Q) and often need Prior Approval.
We always recommend checking with your Local Planning Authority early in the process, as rules can vary by location.
Building Regulations
Agricultural buildings are frequently exempt from full Building Regulations if they are:
Used solely for agriculture
However, Building Regulations (or parts of them) may still apply in the following situations:
The building contains offices, welfare facilities, or areas regularly occupied by people
Where Building Regulations do apply, using high-performance insulated panels like QuadCore can help meet thermal efficiency standards more easily.
Our Recommendation
Because every project is different, we strongly advise speaking to your Local Planning Authority and Building Control department before starting work. They can confirm exactly what permissions or approvals are needed for your specific building and location.
If you tell us more about the size and intended use of your agricultural building, we’re happy to offer guidance on suitable panel specifications.
Not used as a dwelling
Not located within 1.5 times their own height of a building containing sleeping accommodation
Not used for retailing, packing, or public exhibition
It is used for certain types of livestock housing
It stores hazardous materials
Thermal performance requirements (Part L) apply in some cases
Our team can provide technical specifications, U-values, and fire performance data for our panels to support any planning or Building Regulation applications you may need to make.
Our insulated panels have a clean internal steel liner, but most customers choose to add an internal lining for a more traditional, comfortable, and professional finish. Here are the most popular and effective options:
Recommended Option: Plasterboard on Timber Battens
This is the most common and best-performing solution for year-round garden rooms and offices:
Fix timber battens (typically 25mm or 38mm deep) vertically to the internal face of the panels.
Advantages:
Creates a smooth, high-quality internal finish
Other Popular Finishing Options
Our Recommendation
For most garden rooms used as offices, studios, or habitable spaces, we recommend plasterboard fixed to timber battens. This gives the best long-term finish, makes electrical installation much easier, and allows you to achieve a high-quality internal appearance.
You can also combine options — for example, plasterboard on most walls with a timber feature wall.
Additional Tips
Use treated timber battens and fix them securely into the panel ribs or using appropriate fixings.
Fix plasterboard (standard 12.5mm or insulated plasterboard for extra performance) to the battens.
Tape and joint the plasterboard, then decorate as normal (paint or wallpaper).
Provides a service void behind the plasterboard for running electrics and data cables neatly
Improves the overall appearance and comfort of the space
Allows you to add extra insulation if using insulated plasterboard
Option
Best For
Pros
Cons
Plasterboard on Timber Battens
Most garden rooms & offices
Smooth, high-quality finish. Creates a service void for electrics. Allows extra insulation if using insulated boards.
Slightly more work to install than some other options.
Timber Cladding
(e.g. shiplap or T&G)Rustic or warm aesthetic
Attractive natural look. Relatively easy to install.
Can be more expensive than plasterboard.
Plywood or OSB
Utility or modern industrial look
Strong and relatively low cost.
Needs finishing (paint, stain or clear coat).
Direct Painting
Budget / simple utility spaces
Quick and cheap to do.
Shows panel fixings and joints more obviously.
Decorative Wall Panels
Feature walls or quick finish
Fast to fit. Wide range of styles available.
Limited additional thermal benefit.
Consider using insulated plasterboard if you want to improve thermal performance even further.
Make sure any electrical work is carried out by a qualified electrician.
Good ventilation and proper detailing around windows and doors will help prevent condensation.
The Golf Room is an excellent environment for indoor golf simulators. Its insulated panels create a controlled space with consistent temperature, lighting, and acoustics — making it ideal for most modern golf tracking systems.
You can use virtually all popular launch monitors and ball flight tracking equipment inside the Golf Room. The most common options fall into two main categories:
Photometric (Camera-Based) Systems
These use high-speed cameras to track the ball and club. They generally perform very well indoors.
Other Useful Equipment Often Used Alongside Trackers
Putting analysis systems
Important Considerations for Your Golf Room
Space requirements vary between systems. Some need less depth, while others perform best with more room behind the ball.
Most systems can be ceiling-mounted or used with floor stands — both work well in the Golf Room.
The insulated panels help maintain consistent conditions, which improves the accuracy and reliability of the tracking equipment.
Lighting can be important — some camera-based systems prefer controlled lighting (which is easy to achieve in the Golf Room).
Doppler Radar Systems
These use radar technology to track the ball in flight.
Swing analysis sensors
Impact screens & projectors — Most Golf Room customers pair their tracker with a high-quality impact screen and short-throw projector.
While many of our Garden Room and Golf Room kits are designed to be straightforward for competent DIYers, we do not recommend DIY installation for some of our Golf Room models — particularly those with pitched roofs.
Why pitched roof Golf Rooms are not suitable for DIY:
Pitched roofs are significantly more complex and dangerous to install than our standard low-pitch or flat roof designs. Building at height on a sloped roof requires:
Specialist access equipment (such as scaffolding or roof ladders)
Even experienced DIYers often do not have the necessary equipment or insurance to safely and correctly install a pitched roof. Attempting to do so without the right skills and safety measures carries a high risk of injury or a poor-quality finish that could lead to leaks in the future.
Our recommendation:
For Golf Rooms with pitched roofs, we strongly advise using a professional installer or roofing contractor. This ensures the build is completed safely, to a high standard, and in line with building regulations where applicable.
Our flat or low-pitch Golf Room kits remain popular choices for competent DIYers and can usually be installed without specialist roofing equipment.
If you’re unsure which type of Golf Room would be best for your situation, or if you’d like us to recommend suitable professional installers in your area, just let us know the size and style you’re considering. We’re happy to help you choose the right option for your needs and experience level.
Proper fall protection and safety systems
Experience working at height and with roofing techniques
Knowledge of correct fixing methods to ensure the roof is fully weatherproof and structurally sound
We’re happy to provide quotes for larger projects, bulk orders, or custom requirements that go beyond our standard kits.
How to request a quote:
The quickest and easiest way is to contact our team directly using one of the following methods:
Contact form on our website (recommended)
What information helps us give you an accurate quote:
To provide you with the best possible quote quickly, please include as much of the following as you can:
The approximate size of the project (length × width)
Once we receive your enquiry, a member of our team will usually get back to you within 1 working day with a detailed quote and any recommendations.
Need help planning your project?
If you’re not sure exactly what you need, that’s fine too. Just tell us what you’re trying to build and we’ll guide you through the options and suggest the most suitable panels and accessories.
You can also request a custom cutting service quote if you need panels cut to specific sizes.
We look forward to helping with your project!
Email us at info@insulatedpanelstore.co.uk
Call us on 01352 762266 (Limited to openning hours)
Type of panels required (roof, wall, or both)
Panel thickness needed (e.g. 40mm, 80mm, 100mm, etc.)
Quantity of panels (if known)
Any specific requirements (e.g. custom lengths, colour, cut-outs, or flashings)
Your location (for delivery cost estimates)
What is the project this is for a; Garden Room, Golf Room, agricultural building, or another project.
Included drawing for roof or wall area and photos of the area is also useful.
Our insulated panels provide moderate to good sound insulation for most garden room, office, and golf room applications. They perform significantly better than single-skin metal or thin timber structures, but they are not specialist acoustic panels.
Typical Performance
Standard insulated panels (such as our QuadCore KS1000 series) generally achieve a weighted sound reduction (Rw) of around 25–30 dB, depending on panel thickness and how they are installed.
Thicker panels (e.g. 80mm and above) offer better sound insulation than thinner ones.
They are particularly effective at reducing impact noise, such as rain on the roof, which is a common complaint with traditional metal or polycarbonate roofs.
How to Improve Sound Insulation
Many customers choose to add an internal lining, which makes a noticeable difference to acoustics:
Fixing plasterboard on timber battens is the most popular upgrade. This can significantly improve sound reduction and also creates a service void for electrics.
Using insulated plasterboard provides even better thermal and acoustic performance.
Adding acoustic insulation (such as mineral wool) between the battens can further enhance soundproofing if required.
Real-World Performance in Our Rooms
Golf Rooms: The panels do a good job of containing the sound of club strikes and ball impacts, while also reducing external noise entering the space.
Garden Rooms & Offices: They provide a comfortable level of sound insulation for working or relaxing. Most customers find the performance perfectly acceptable for normal use once the room is lined internally.
Important Note
If you need very high levels of sound insulation (for example, a music studio, home cinema, or a room next to a very noisy environment), our panels alone may not be sufficient. In these cases, we recommend combining the panels with additional acoustic treatments or consulting a specialist.
Would you like advice on the best way to improve acoustics in your specific project? Just let us know the intended use of the room and we’ll be happy to make recommendations.
Click Here To Contact Us
Yes, it is possible to build one of our Garden Rooms in around 8 hours, as shown in the video below. However, there are some important points to understand:
The video demonstrates a small, experienced team working efficiently on a well-prepared base with all materials ready on site. This is a best-case scenario and shows what can be achieved with good preparation and a coordinated team.
Realistic expectations:
With a small experienced team (2–4 people), a basic Garden Room can often be erected in 1 day. For most competent DIYers working alone or with one helper, it usually takes 1–3 days, depending on the size of the room and your experience level. The most time-consuming parts are usually preparing the base correctly and fitting the roof and flashings.
The key to a fast build is having a solid, level base already completed, all fixings and tools ready, and following the step-by-step process shown in our installation videos.
Watch the 8-hour build video:
If you're planning to build your Garden Room yourself, we recommend watching our full step-by-step installation videos first. They show the correct techniques and will help you build safely and efficiently. Would you like us to recommend the best Garden Room size and style for your project? Just let us know your requirements.
Click Here To Contact Us
Yes, it is possible to build a larger Granda Garden Room relatively quickly when done efficiently. The video below shows one of the fastest builds we’ve recorded for the Granda model.
What the video shows:
This video demonstrates a small, experienced team building a Granda Garden Room in the most efficient way possible. The Granda is one of our larger models, so the build involves more panels and a bigger roof structure than our smaller rooms.
With good preparation (especially having a completed, level base ready), the right tools, and a coordinated team, a Granda Garden Room can be erected in 1 to 2 days
Realistic build times:
Experienced team (3–5 people): Often completed in 1–2 days Competent DIYers (2 people): Usually takes 2–4 days Working alone: Can take 4–6 days depending on experience and weather
The biggest factors that affect build speed are having a solid, level base already in place and being well organised with fixings and tools before you start.
Watch the fast Granda build video:
If you're planning to build a Granda Garden Room yourself, we strongly recommend watching our full step-by-step installation videos first. They show the correct techniques for safely and efficiently assembling larger rooms.
Would you like advice on the best way to build a Granda Garden Room for your project? Feel free to contact us with your requirements.
Yes, our insulated panel kits are very popular for building dedicated Home Cinema and Golf Simulator Rooms. Many customers use them to create high-quality, insulated spaces for these purposes.
Why our kits work well for Home Cinemas & Golf Sims:
Excellent thermal insulation keeps the room comfortable year-round Good sound reduction helps contain noise (especially useful for golf sims and home cinemas) Quick and straightforward to build compared to traditional construction Strong and durable structure Can be lined internally with plasterboard for a professional finish
The video below shows how one of our kits can be used to create a versatile room suitable for both a home cinema and golf simulator setup.
Watch the video:
Key things to consider:
Choose the right panel thickness for better sound insulation and thermal performance Most customers add internal plasterboard lining for the best finish and acoustics Plan your layout early for screen placement, projector, seating, and golf simulator equipment Good ventilation and electrics should be planned before building
If you're thinking of building a Home Cinema or Golf Simulator Room, feel free to contact us. We can recommend the most suitable kit size and panel specification for your project.
Fitting the insulated roof panels is one of the most important parts of building your Garden Room. We have created a clear, step-by-step video guide that shows exactly how to do it correctly and safely.
Watch the video guide:
Key points covered in the video:
How to safely lift and position the roof panels Correct fixing methods and screw placement How to ensure a weatherproof seal between panels Useful tips for working at height
We recommend watching this video before you start fitting your roof panels. It will help you avoid common mistakes and achieve a professional finish.
Helpful tips:
Make sure you have the correct fixings and sealant ready before you begin Work with at least one other person when lifting roof panels Always follow the fixing pattern shown in our installation guides Watch our other installation videos for fitting wall panels and flashings If you have any questions while watching the video or during your build, feel free to contact our team. We’re happy to help.
Click Here To Contact Us
Yes, we have created a full, start-to-finish video showing how to build one of our Garden Rooms. This is especially useful if you want to see the entire process in one go.
Watch the full build video:
What’s included in this video:
Complete step-by-step build from start to finish Wall panel installation Roof panel fitting Fixing and sealing techniques Flashing and finishing details
This video is ideal if you prefer watching the full process rather than jumping between shorter clips. It gives you a realistic idea of how the build comes together.
Important notes:
The speed of the build depends on your experience, team size, and preparation We strongly recommend watching our shorter, focused installation videos as well (especially for the roof and flashings) Always follow the correct fixing patterns and safety procedures shown
If you’re planning to build your own Garden Room, we suggest watching this full video first, then referring back to our other installation videos for specific steps.
Need help choosing the right Garden Room for your project? Feel free to get in touch with our team.
Yes,we have a video showing the full build of a Golf Simulator Room using our insulated panels.
Watch the Golf Simulator Room build video:
What’s shown in the video:
Complete step-by-step build of a Golf Simulator Room Installation of wall and roof panels Fixing and sealing techniques Finishing details suitable for a golf simulator setup
This video is ideal if you're planning to build your own Golf Simulator Room. It gives you a clear overview of how the structure comes together using our insulated panel system.
Helpful tip:
Many customers who build Golf Simulator Rooms also add internal plasterboard lining after the build to improve acoustics and create a cleaner finish. We have a separate FAQ on internal lining options if you’d like more information.
Build Note
We recommend using a professional builder to construct this type of pitched roof room, as it will require specialist equipment and experience.
If you're thinking of building a Golf Simulator Room, feel free to contact us. We can advise on the best room size and panel specification for your setup.
A cusotmer, The Restoration Couple, created two helpful videos that show the full process of delivering and installing long KS1000RW roof panels on larger structures.
1. Panel Delivery and Offloading
This video shows what happens when the long KS1000RW roof panels arrive on site, including how they are safely offloaded from the delivery lorry.
2. Installing Long Roof Panels
This video demonstrates how the long KS1000RW roof panels are lifted and installed onto a large structure.
Key points covered:
How long roof panels are delivered and safely offloaded Equipment and methods used to lift and position long panels Correct installation techniques for larger roof structures Important safety considerations when working with long panels
These videos are especially useful if you are planning a larger project (such as a bigger Garden Room, Golf Simulator Room, or agricultural building) that uses long roof panels.
If you have any questions about panel delivery, offloading, or installation for your specific project, please contact our team. We’re happy to provide advice and guidance.
Kingspan QuadCore is widely regarded as one of the highest-performing insulation cores currently available in insulated panels. It is a next-generation hybrid closed-cell foam developed by Kingspan, and it generally outperforms standard PIR (polyisocyanurate) cores in two key areas: thermal performance and fire performance.
Thermal Performance
QuadCore offers approximately 11% better thermal conductivity than high-quality PIR insulation. Typical lambda (λ) value for QuadCore is 0.018 W/m·K. This means you get lower U-values for the same panel thickness compared to standard PIR panels. In practical terms, QuadCore panels can provide better energy efficiency and lower heating/cooling costs, or allow you to achieve the same insulation performance with a thinner panel.
Fire Performance
This is where QuadCore shows the biggest improvement over standard PIR:
QuadCore has superior reaction to fire performance. It produces less smoke and has a higher ignition temperature than most PIR cores. It achieves better fire ratings and has passed more demanding large-scale fire tests. In the event of a fire, QuadCore tends to perform better in terms of fire spread and smoke generation.
Summary Comparison
Is QuadCore worth it?
Yes, if you want the best possible thermal and fire performance from your insulated panels. It is particularly beneficial for Golf Simulator Rooms, Home Cinemas, and buildings where energy efficiency and safety are priorities. For basic garden rooms or agricultural buildings where cost is the main concern, standard PIR panels can still perform well.
All of our premium KS1000RW roof panels and KS1000MR wall panels use QuadCore insulation as standard.
Performance Area
Kingspan QuadCore
Standard PIR
Winner
Thermal Efficiency
Excellent (0.018 W/m·K)
Good
QuadCore
Fire Performance
Very Good
Good
QuadCore
Smoke Production
Lower
Higher
QuadCore
Long-term Durability
Excellent
Very Good
QuadCore
QuadCore has significantly better thermal performance than standard PIR insulation. This means you can often achieve the required U-value using a thinner QuadCore panel, whereas a standard PIR panel would need to be thicker to match the same insulation level.
Here are the two main practical benefits of using a thinner panel:
1. Less Structural Support Required
A thinner and lighter panel puts less weight on the building structure. This can mean:
Reduced loading on purlins, rafters, or the supporting frame
Potentially smaller or lighter structural steelwork or timber
Lower overall building costs in some larger projects
2. More Internal Headroom
Using a thinner roof panel gives you more usable internal height. This is especially useful for:
Golf Simulator Rooms (more clearance for club swing) Home Cinemas Any room where headroom is important Even a small reduction in panel thickness can make a noticeable difference to the feel and usability of the space. Additional Advantage – Fire Performance
Besides the benefits of a thinner panel, QuadCore also offers much better fire performance than standard PIR. It produces less smoke and performs better in fire situations, which is an important safety consideration. Summary
While QuadCore costs more than standard PIR, using a thinner QuadCore panel to meet the required U-value gives you two clear advantages: less structural support needed and more internal headroom. Combined with better fire performance, this makes QuadCore a popular choice for many projects.
We offer the following thicknesses for our QuadCore KS1000RW roof panels:
40mm
80mm
100mm
120mm
137mm
150mm
Choosing the right thickness depends on your budget, how energy efficient you want the building to be, and the intended use of the structure. Here’s a practical guide:
Quick Recommendation Guide
Key Factors When Choosing Thickness
Summary – Our Most Common Recommendations
40mm: Best for basic agricultural buildings, car ports, or when overlaying an existing roof. 80mm: Good choice for garages, simple outbuildings, and conservatory roofs where cost is a priority. 100mm – 120mm: Most popular choice for workshops, larger outbuildings, and leisure buildings. Offers a good balance of performance and headroom. 137mm – 150mm: Best if you want maximum insulation and are happy to pay more upfront for lower running costs. Need Help Choosing?
If you tell us: What the building will be used for (e.g. garage, workshop, barn, golf simulator, etc.) The approximate size Whether it’s a new build or an overlay on an existing roof We can recommend the most suitable panel thickness for your project.
Click Here To Contact Us
Intended Use
Recommended Thickness
Why?
Approx. U-Value
Barns, Car Ports & Basic Outbuildings
40mm
Lowest cost option. Suitable where high insulation is not required
0.47
Garage Roofs & Simple Outbuildings
80mm
Good balance between cost and basic insulation
0.23
Conservatory Roofs & Outbuildings
80mm – 100mm
Better insulation while keeping costs reasonable
0.23 – 0.18
Workshops, Garages & Larger Outbuildings
100mm
Better thermal performance for regular use
0.18
Golf Simulator Rooms & Home Offices
100mm – 120mm
Good insulation with reasonable headroom
0.18 – 0.15
High Performance / Future Proof
120mm – 137mm
Excellent insulation and long-term energy savings
0.15 – 0.13
Maximum Insulation Required
137mm – 150mm
Highest level of thermal efficiency
0.13 or lower
Factor
Thinner Panels (40mm–80mm)
Thicker Panels (100mm–150mm)
Upfront Cost
Lower
Higher
Energy Efficiency
Basic
Excellent
Internal Headroom
More headroom
Less headroom
Structural Support Needed
Less weight on structure
More weight on structure
Long-term Running Costs
Higher
Lower
